You’ve bought the perfect camping stove. You’ve planned the perfect trip. You arrive at your campsite, screw on your fuel canister, click the igniter… and nothing happens the way it should. The flame is weak, sputtering, or won’t light at all in the cold. Or maybe you grabbed the wrong canister entirely and it doesn’t even fit your stove. In that moment, you learn a hard truth that every experienced camper already knows: your stove is only as good as the fuel that feeds it.
Gas canisters are the unsung heroes of outdoor cooking. They’re the difference between a hot meal and a cold disappointment, between a stove that roars to life on a frosty morning and one that dies the moment temperatures drop. And yet, most people give them almost no thought — grabbing whatever canister is on the shelf without understanding the crucial differences between butane, propane, and isobutane, or why those differences can make or break a trip.
That ends today. This complete guide demystifies camping gas canisters once and for all. By the time you finish reading, you’ll understand exactly which fuel works best in which conditions, how to choose the right canister for your stove, how to store and dispose of them safely, and the insider tricks that keep your stove performing flawlessly even when the weather turns brutal.
Let’s fuel up and figure this out. 🔥
At their core, camping gas canisters are pressurized metal containers holding liquefied fuel gas that vaporizes to feed your camp stove. When you open the valve, the pressure inside pushes the fuel out as a gas, which burns to produce the flame you cook with. Simple in concept, but the type of gas inside makes an enormous difference in real-world performance.
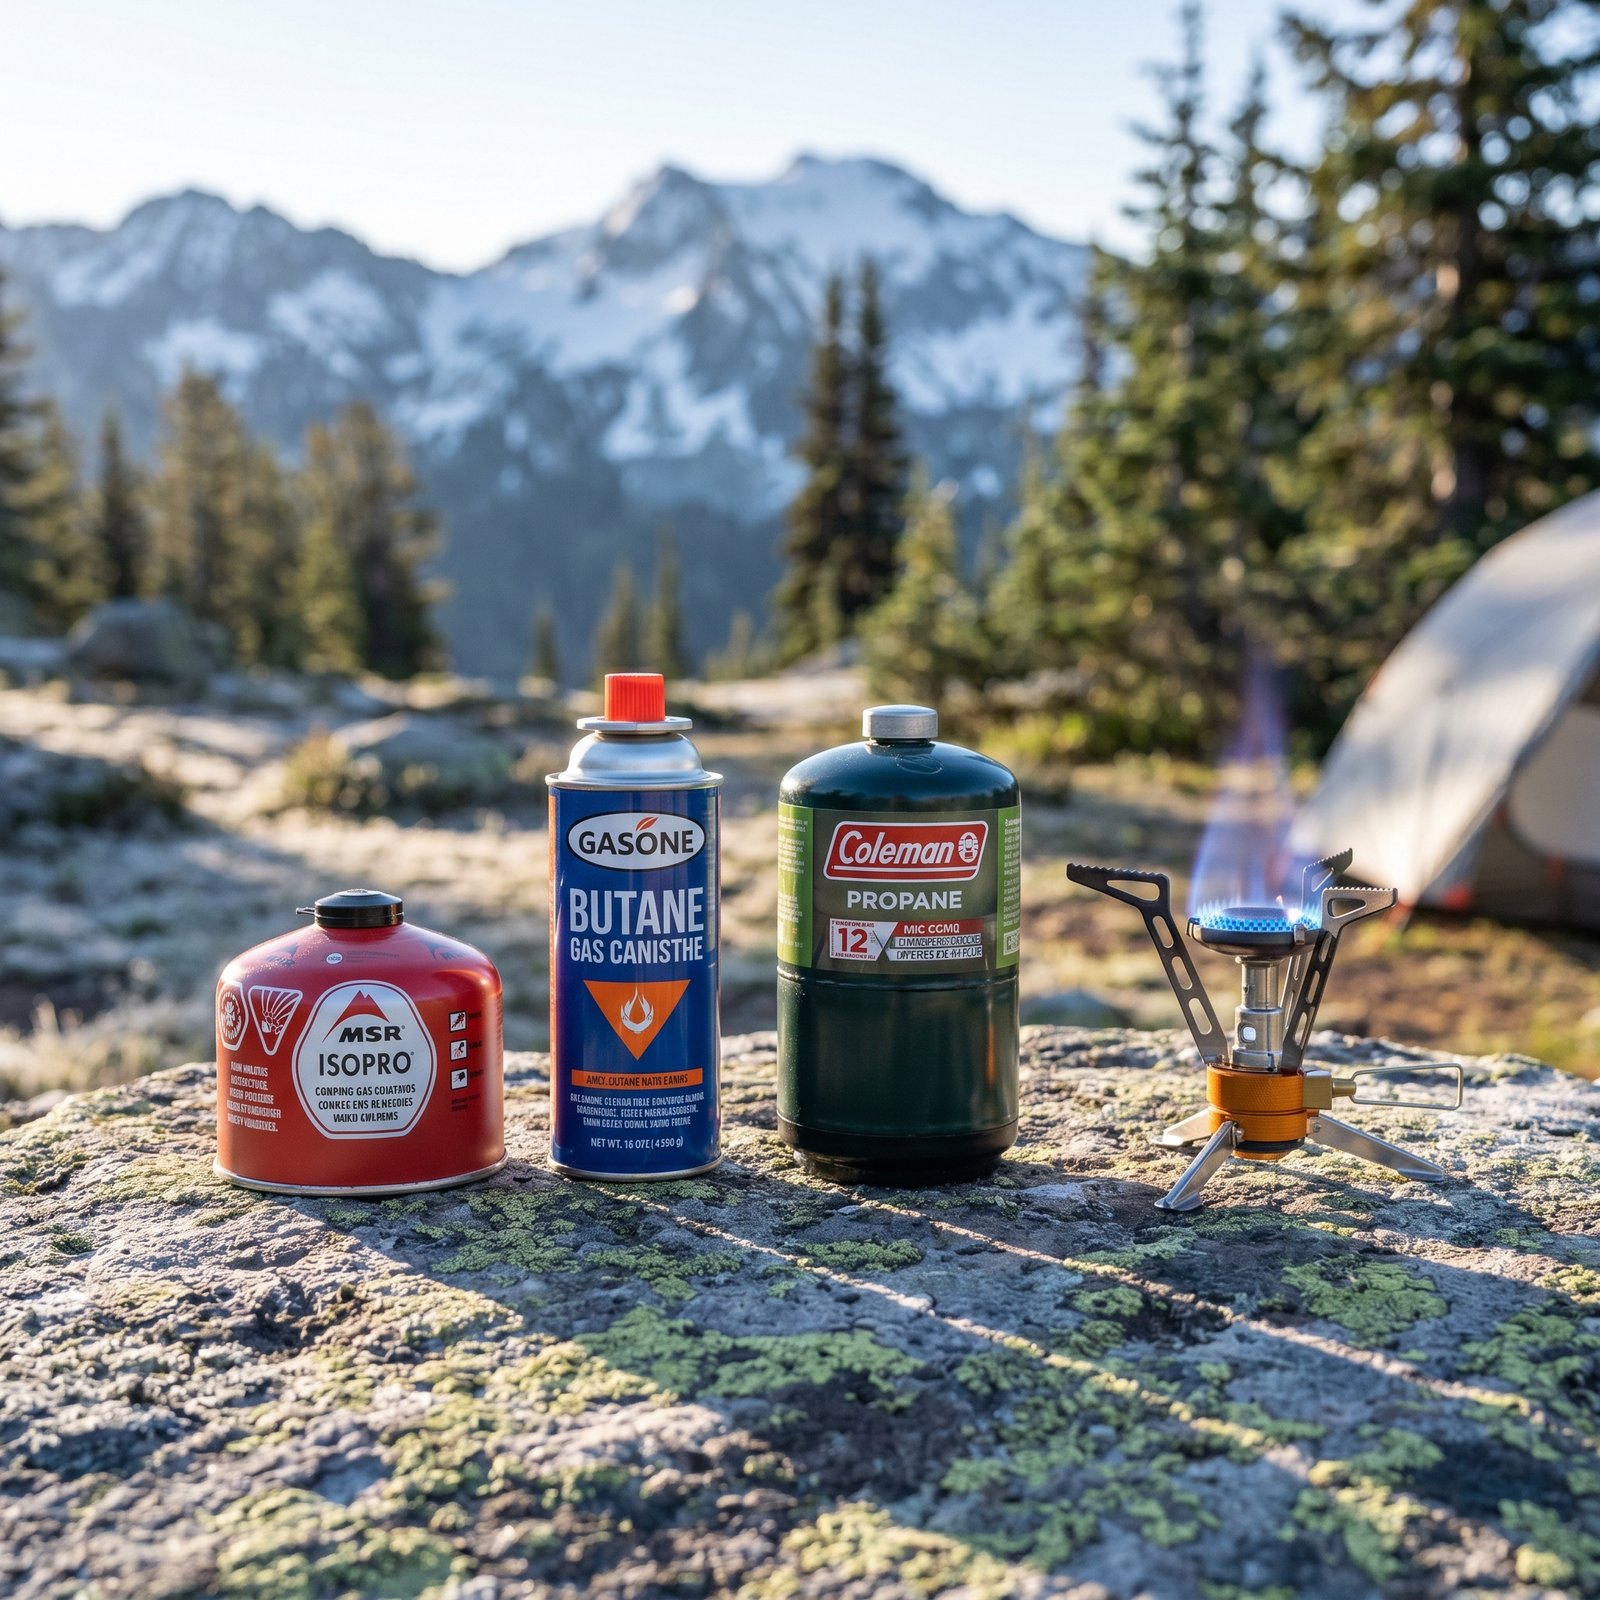
The most common camping fuels are butane, propane, and isobutane — sometimes used alone, but often blended together to balance their strengths. Each gas has a different boiling point, which determines how well it vaporizes and performs in cold temperatures. This single property explains most of the differences you’ll notice between canisters, and understanding it is the key to never being caught with a stove that won’t light.
Canisters also come in different valve types and attachment styles, which determine compatibility with your specific stove. Getting the right combination of fuel type and valve fitting is essential, and it’s where a lot of campers go wrong. Let’s break down each fuel so you know exactly what you’re buying.
Understanding the three primary camping fuels is the foundation of choosing the right canister. Each behaves differently, especially as temperatures change, and knowing their strengths lets you match fuel to conditions with confidence.
Butane is inexpensive and burns cleanly, making it a popular choice for casual, warm-weather camping. Its weakness is cold: butane struggles to vaporize once temperatures approach freezing, so its flame weakens and eventually fails in chilly conditions. It’s best reserved for summer trips and mild climates where its low cost and clean burn shine.
Propane is the cold-weather champion of the three, vaporizing readily even in deep freezing temperatures. This reliability in the cold makes it the standard for car camping and winter use, though it requires a heavier, more robust canister to safely contain its higher pressure. That extra weight makes pure propane less ideal for backpacking, but unbeatable when temperatures plummet.
Isobutane is the backpacker’s favorite, offering significantly better cold-weather performance than regular butane while remaining light enough to carry. It vaporizes well in cool conditions, delivers strong heat output, and packs efficiently — which is why it’s the premium choice for serious hikers and three-season adventures.
Here’s where it gets clever. Most premium backpacking canisters don’t contain a single pure gas — they’re blends, typically combining isobutane and propane, to capture the best qualities of each. This blending is the secret behind the reliable, high-performance canisters that experienced campers swear by.
The logic is elegant. Propane vaporizes readily in the cold and maintains pressure, while isobutane provides excellent overall performance and energy density. By blending them, manufacturers create a fuel that lights reliably in cool weather, burns hot and efficiently, and stays light enough to carry comfortably on the trail. The propane component helps the canister keep performing as temperatures drop, addressing the main weakness of butane-based fuels.
This is why, when you shop for quality backpacking fuel, you’ll most often see isobutane-propane blends. They represent the sweet spot for three-season camping — reliable enough for chilly mornings, efficient enough for long trips, and light enough that your back won’t complain. For most backpackers, a quality blended canister is the smart default choice.
Choosing the right canister isn’t just about the fuel inside — it’s also about making sure it physically fits and works with your specific stove. Getting this combination right prevents the frustrating discovery at camp that your fuel and stove don’t match.
The most important factor is the valve and attachment type. The widespread threaded valve standard is used by most modern backpacking canister stoves worldwide, making these screw-on canisters broadly compatible. However, some stoves — particularly certain budget or regional models — use different attachment systems, so always confirm your stove’s required canister type before buying. Using an adapter is sometimes possible but should be approached carefully.
Next, consider the fuel type for your conditions: an isobutane-propane blend for three-season backpacking, propane for winter or car camping, and inexpensive butane only for warm-weather casual use. Finally, choose an appropriate canister size for your trip length and group — a small canister for a quick solo overnight, larger ones for extended trips or feeding several people. Matching all three factors guarantees a stove that performs exactly as you expect.
Cold weather is where cheap fuel choices come back to haunt you, and understanding how temperature affects canisters is essential for anyone camping outside of summer. The core issue is that each fuel has a temperature below which it struggles to vaporize, and a gas that won’t vaporize can’t feed your stove.
Regular butane is the first to fail, weakening as temperatures approach freezing and becoming nearly useless in genuine cold. Isobutane performs notably better, extending your reliable range into cooler conditions, while propane keeps vaporizing even in deep cold — which is exactly why blended and propane-containing fuels are the answer for chilly trips. As a canister empties, the remaining fuel also cools and performs worse, compounding the problem in cold weather.
There are practical tricks to help. Keeping your canister warm — inside your jacket or sleeping bag before use — dramatically improves cold-weather performance, as does insulating it from frozen ground while cooking. For serious winter and high-altitude expeditions, however, many experienced campers switch to liquid fuel stoves entirely, since pressurized canisters reach their limits in extreme cold. Knowing these limits keeps you from being stranded with a stove that won’t light when you need it most.
Pressurized fuel deserves respect, and following basic safety rules keeps your outdoor cooking safe and worry-free. Gas canisters are designed to be safe when used correctly, but mishandling them can create serious hazards, so these guidelines are non-negotiable.
Always use your stove and canister in a well-ventilated area, never inside a closed tent or enclosed space, because burning fuel produces carbon monoxide that can be deadly in confined areas. Before lighting, check connections for leaks — a hissing sound or the smell of gas means you should shut off and reconnect rather than igniting. Keep canisters away from open flames and extreme heat, and never puncture, crush, or attempt to refill a disposable canister, as this risks dangerous ruptures.
When cooking, place your stove and canister on a stable, flat, non-flammable surface away from dry vegetation, and never leave a lit stove unattended. After use, ensure the valve is fully closed and the canister has cooled before packing it. These simple precautions take seconds and ensure that pressurized fuel remains the safe, convenient tool it’s meant to be.
One of the most common camping headaches is not knowing whether a partially used canister has enough fuel left for your trip. Fortunately, there are reliable ways to estimate the remaining fuel so you’re never caught short or carrying unnecessary weight.
The simplest method is the float test: gently place the canister in water and observe how it sits. A full canister sinks low, while an empty one floats high, and the waterline gives you a rough visual gauge of how much fuel remains. Comparing the floating height against a known full and empty canister makes this surprisingly accurate for a quick field check.
The most precise method is weighing the canister. Quality canisters are marked with their empty (tare) weight and full fuel weight, so by weighing your canister and subtracting the tare weight, you can calculate exactly how much fuel is left. A small kitchen or luggage scale at home lets you plan trips precisely, ensuring you carry enough fuel without the excess weight of a needlessly full canister. Mastering these checks takes the guesswork out of fuel planning.
Used canisters can’t simply be tossed in the trash, and disposing of them responsibly is both an environmental duty and often a legal requirement. An empty-looking canister may still contain residual gas and pressure, so proper handling matters for safety and for recycling.
First, ensure the canister is completely empty by running the stove until no more fuel comes out and the canister is fully depressurized. Many regions and manufacturers recommend using a dedicated canister-recycling tool that safely vents any remaining gas and punctures the empty canister, marking it as safe and recyclable. Never puncture a canister that still contains fuel, and never do so near any flame or heat source.
Once fully empty and depressurized, steel canisters can often be recycled with scrap metal, though rules vary by location — so check your local recycling guidelines or outdoor retailer for the correct procedure in your area. Some outdoor stores and recycling centers accept used canisters directly. Taking these steps keeps the outdoors clean, conserves resources, and ensures these pressurized containers are handled safely from first use to final disposal.
A few insider habits will stretch your fuel further and keep your stove performing at its best throughout every trip. These small practices add up to more reliable cooking and fewer fuel-related surprises in the field.
Keep your canister insulated from cold ground and, in chilly weather, warm it briefly against your body before cooking to maintain strong pressure and flame. Shield your stove from wind, since a breeze dramatically increases fuel consumption by carrying heat away from your pot — a windscreen or natural barrier can cut fuel use significantly. Use a lid on your pot and only heat the water you actually need, both of which conserve fuel meaningfully over a trip.
It’s also wise to consolidate partial canisters at home rather than carrying several half-empty ones, and to always pack a little more fuel than you think you’ll need as a safety margin, especially in cold conditions where consumption rises. These habits ensure you cook efficiently, carry the right amount of fuel, and never face the frustration of running dry before your trip is done.
Let’s bring it all together. For most three-season backpacking, an isobutane-propane blend with the standard threaded valve is the smart default — reliable in cool weather, efficient, and light enough to carry comfortably. For winter and car camping, lean toward propane or propane-heavy blends that perform in genuine cold, and reserve cheap butane for warm-weather, casual use where its low cost shines.
Always confirm your canister’s valve type matches your stove before buying, choose a size appropriate to your trip and group, and respect the safety and disposal rules that keep pressurized fuel safe and the outdoors clean. Master the simple tricks for cold-weather performance and fuel estimation, and you’ll never again be caught with a stove that won’t light or a canister that runs dry at the worst moment.
Fuel might be the most overlooked piece of your camp kitchen, but as you now know, it’s also one of the most important. Choose wisely, handle it safely, and your stove will reward you with hot meals and reliable flame on every adventure — from balmy summer evenings to frosty mountain mornings.
Cook well, stay safe, and enjoy every meal under the open sky. 🔥
Found this guide helpful? Share it with your camping crew and explore our other reviews on camping stoves, fire starters, and lighters — your complete resource for mastering fire and fuel in the great outdoors.

No Comments